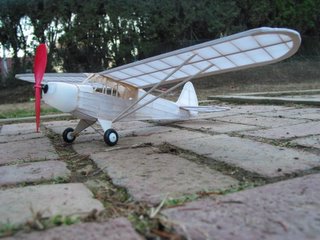
This is Pilot JS's first balsa and tissue build. Test flights have been limited to low flying hand tosses. The plane angles a bit right and the right landing gear has been beaten up a bit. The CG (Center of Gravity) aligned perfectly. The plane flies nicely and gently. Currently, Pilot JS is waiting for a wind free morning to test fly the plane properly.
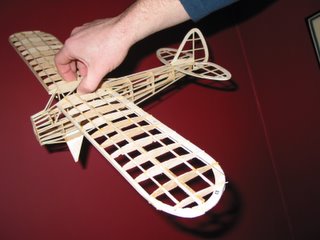
The build took Pilot JS about 20 hours. Below in a previous post with a list of "lessons learned." There are a couple more to add to the list (1) use two tooth picks to brace the wings to the fuselage. It is IMPORTANT that you peirce the tooth picks into place before you put the tissue paper on, (2) dry fit everything before adding the tissue paper, and (3) after placing the tissue paper on three sides of the fuselage run the rubber band through the fuselage.

Without a doubt, if you are looking for a quick flight fix the AeroAce is perfect. Pilot JS flies his in his backyards all the time. It costs $29 at Target, Toys-R-Us, and K-Mart. It is a micro RC 2-channel bi-plane.
sells a landing gear and a light set so you can fly at night.
If you fly in a gym, parking lot, or any where with a hard surface you'd probably like a landing gear. The AeroAce is capable of ROG (rolling of the ground) takeoffs, touchdowns, and landings.
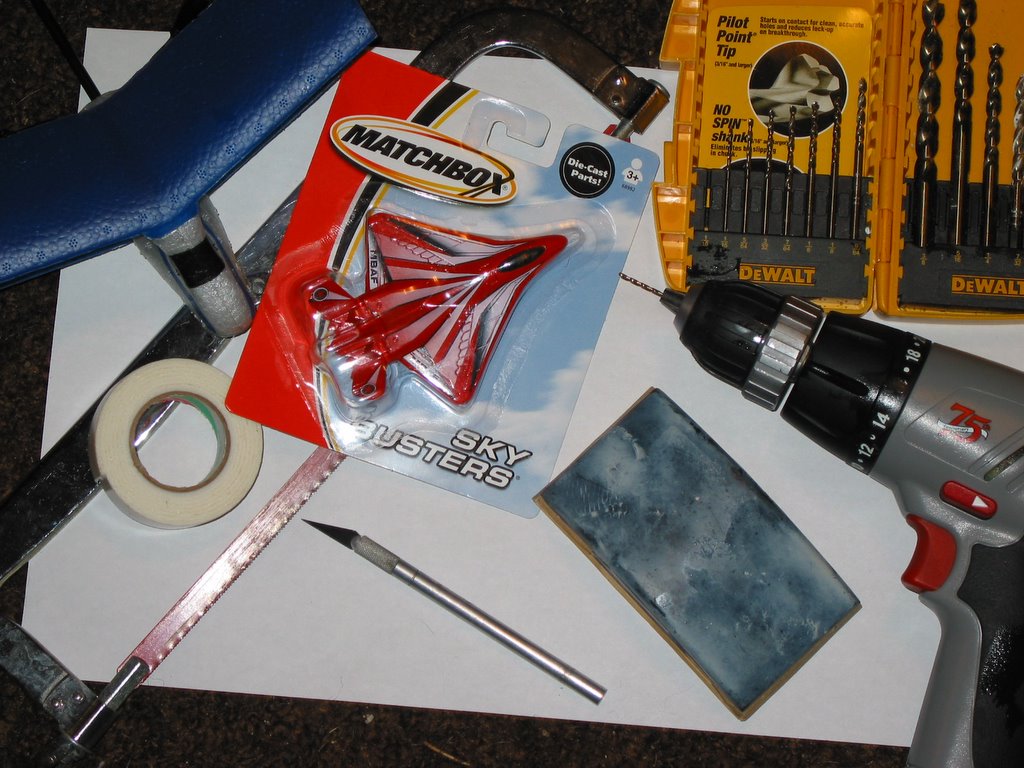
For $1.97 you can make your own landing gear. What need is (1) Matchbox airplane from Target, (2) drill with bit, (3) hack saw, (4) sandpaper, (5) double stick take or 5-Minute Epoxy, and (6) a block of EPP foam is optional.
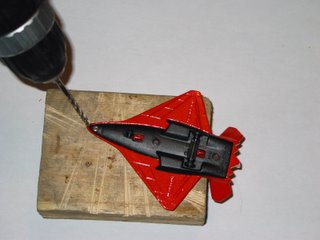
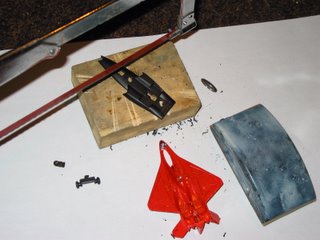
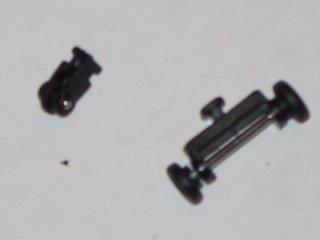
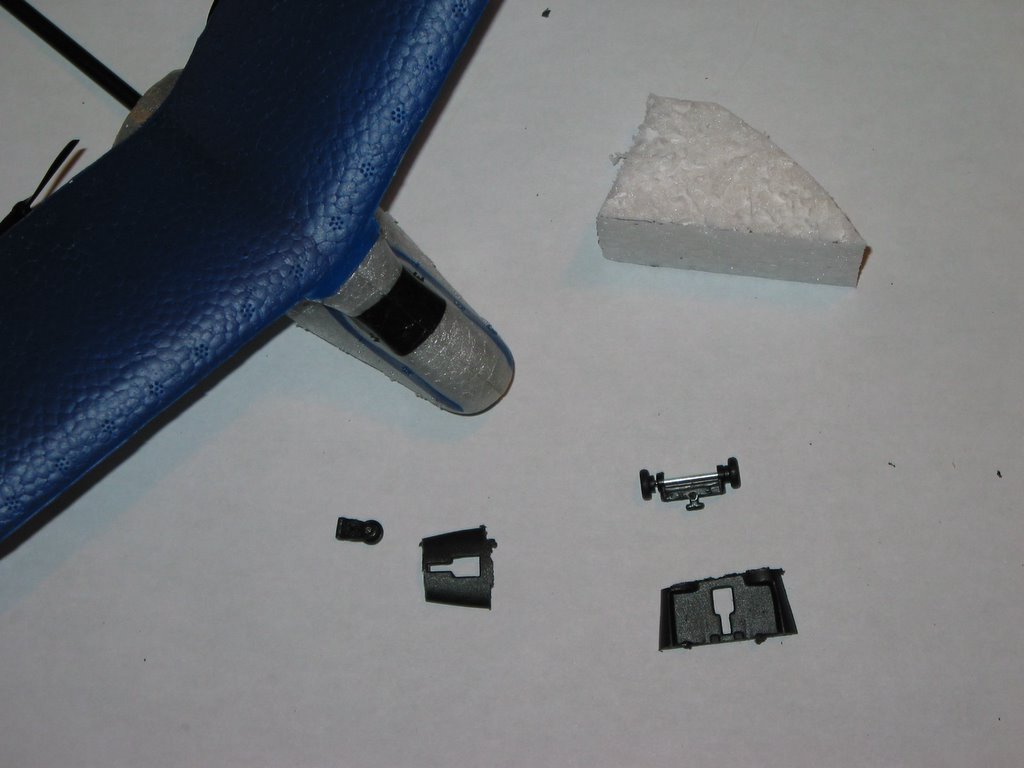
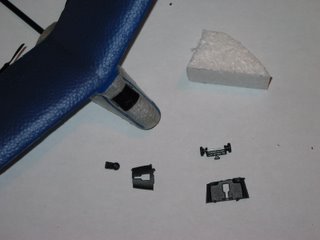 To start (1) flip over the Matchbox airplane and drill out the three chassis brackets, (2) separate the chassis base from the top and remove the wheels, (3) using a hacksaw trim the wheel frame from the chassis. This locking frame will hold your wheels in place. (4) Sand the plastic wheel frame down as much as possible to decrease the weight. (An OPTION to this is to cut out a small block of EPP Styrofoam and use a file to create a groove to lock in your wheels. This block of EPP foam will be glued to the AeroAce.) (5) Now sand your wheels smooth with fine grit sandpaper and oil the wheels. Pilot JS used sewing oil. (6) Finally, put the wheels back in the frame and use double stick tape to mount it to the AeroAce. The single wheel gets mounted beneath tail at the point it intersects with the fuselage tubing. The front wheel (which has two wheels) gets mounted behind the plastic on/off switch. It should fit perfectly. When performing a ROG takeoff your plane may lean right or left, if so adjust the wheel to compensate. Make sure your wheels are mounted so the locks in the wheel mounts are on the back of your airplane. You'll be surprised with how quickly your plane will move on pavement.

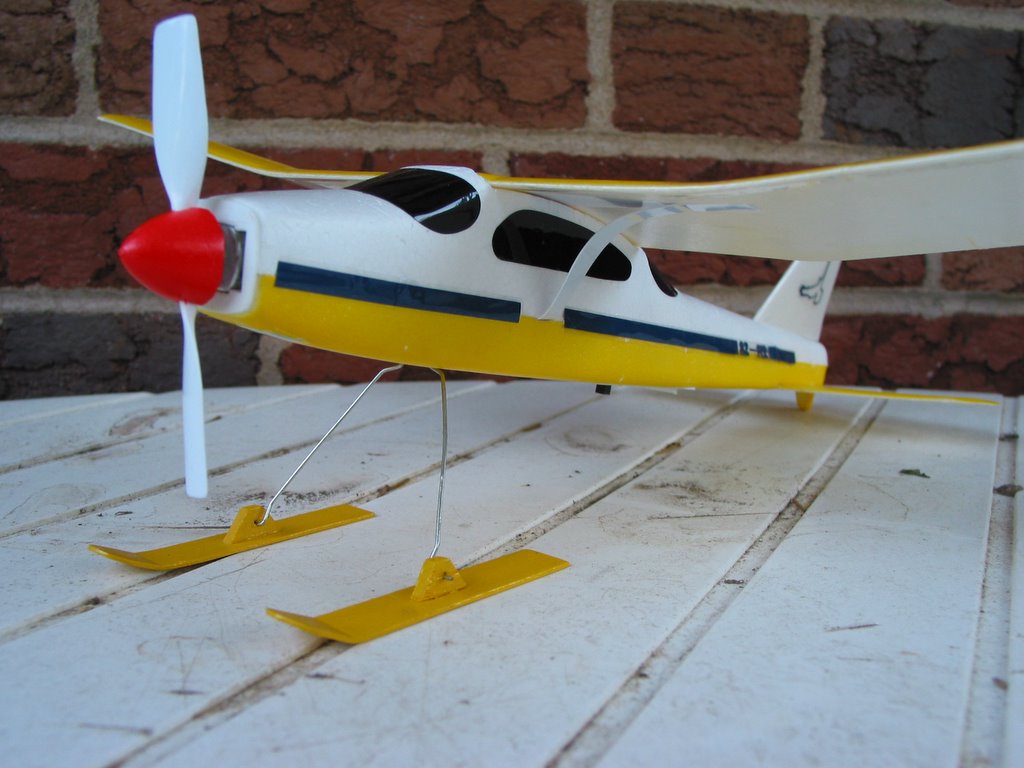
Pilot DS is obsessed with making snow skis as opposed to buying them. He quickly rubbed off on Pilot JS and now JS is on the bandwagon.
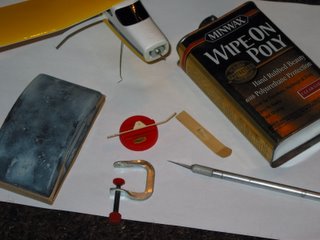
Snow skis are rather easy to make and can be done affordably. All you need is (1) a sheet of balsa, (2) a hobby knife, (3) a sand paper block with fine grit sandpaper, (4) a bowl of water, (5) polyurethane, (4) a set of small vice grips -- preferably hobby vice grips, which can be purchased for a few bucks at Harbor Freight Tools, (5) spray paint, and a (6) set of springs. The total cost for a set of ten skis costs me about $6.00 or $7.00.
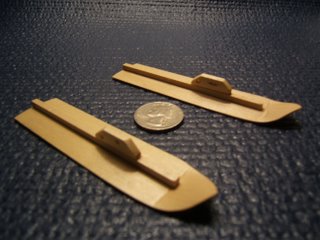
The first thing to do is use a pencil and very lightly sketch out the shape of the skis. Then cut the skis from the balsa sheet using your hobby knife. After that sand out the shape of the ski. Soak the skis in a bowl of water for 10 minutes. Remove the skis and using the vice grip lock the to a cutting board or workbench. Push a pencil under the nose of the ski to create the lip shape for the tip of the ski. Use a hair dryer to solidify the new shape of the ski -- this may take 5 minutes. Now cut out the wheel bracket and glue it to the ski using white glue. You may also decide to use a balsa wood brace down the length of the ski to reinforce it, if so do it now. Once it dries lightly sand everything down and wipe it clean with a micro fiber cloth. Now you are ready to use the polyurethane. I recommend applying 7-10 light coats. Allow skis to dry well before the next coat. After the final coat you can lightly spray paint your skis -- with outside furniture paint -- to match you skis. The final step is mount a spring from the front of the ski to the axel so that the ski can flux as you dive over snow. I highly recommend inserting a wheel pin and gluing it inside of the ski so when you mount the axel inside the ski the ski can easily rotate. We currently don't have snow, but once we do we will video tape the effectiveness of our skis.
 This is Pilot JS's first balsa and tissue build. Test flights have been limited to low flying hand tosses. The plane angles a bit right and the right landing gear has been beaten up a bit. The CG (Center of Gravity) aligned perfectly. The plane flies nicely and gently. Currently, Pilot JS is waiting for a wind free morning to test fly the plane properly.
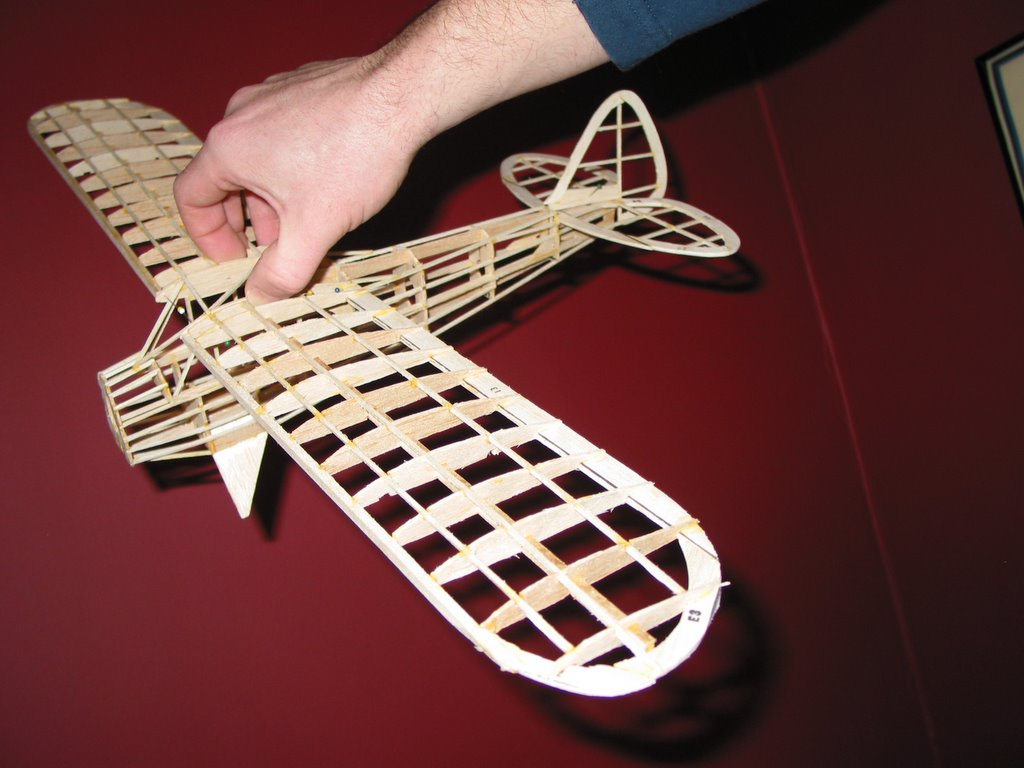 The build took Pilot JS about 20 hours. Below in a previous post with a list of "lessons learned." There are a couple more to add to the list (1) use two tooth picks to brace the wings to the fuselage. It is IMPORTANT that you peirce the tooth picks into place before you put the tissue paper on, (2) dry fit everything before adding the tissue paper, and (3) after placing the tissue paper on three sides of the fuselage run the rubber band through the fuselage.