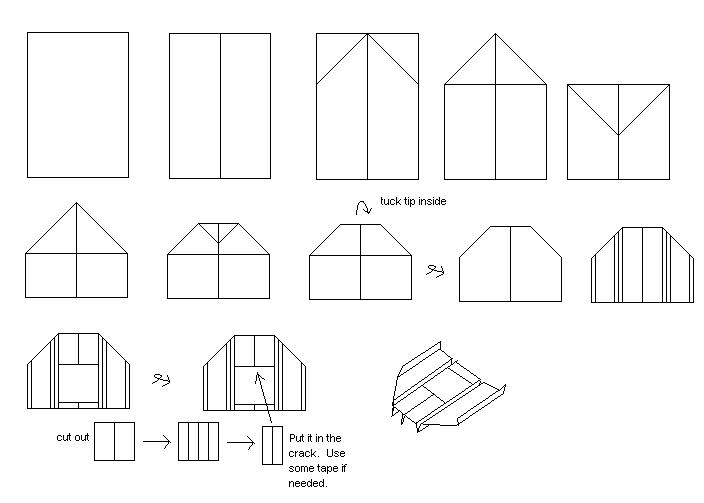
 Wow, it's been ages since I last posted here! Anyway, here's a new paper airplane design. It's very quick and easy to make, but you start with a square paper rather than a rectangle one. Hope you enjoy it!
Quick paper airplane design
Wow, it's been ages since I last posted here! Anyway, here's a new paper airplane design. It's very quick and easy to make, but you start with a square paper rather than a rectangle one. Hope you enjoy it!
Ice Flying
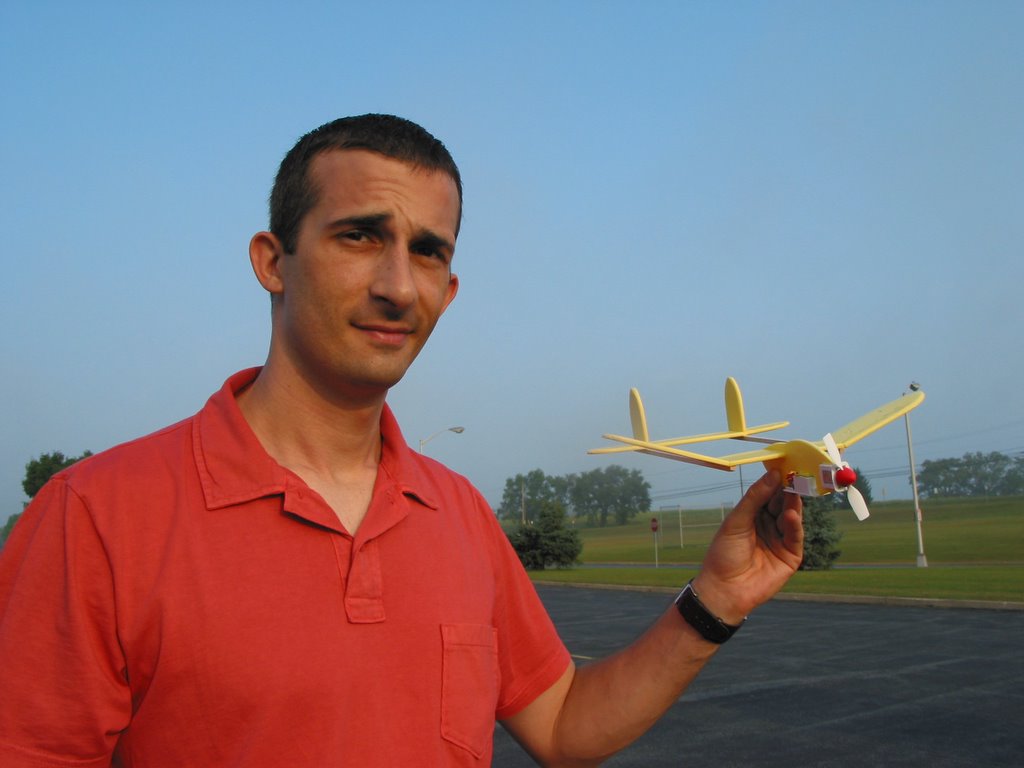
No matter the weather Maxine, Pilot DS's Hobbyzone Outlaw, flew. And no hand launching either!
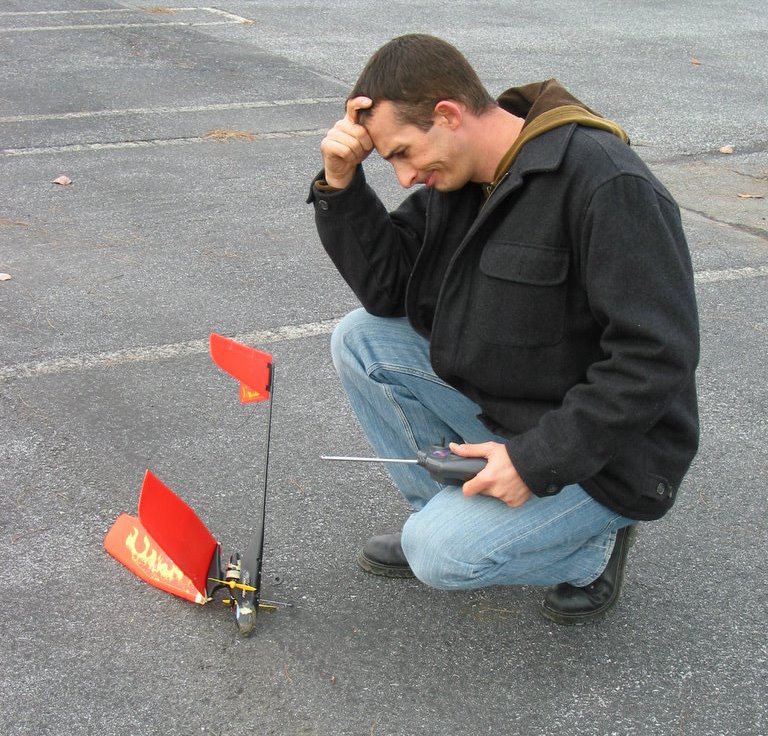
Stall To Nose Dive
Pilot DS flies a little too hot for a 2-channel Hobbyzone Outlaw and can not recover from his stall . . . smash!
Viva La Maxine!
Long live Maxine! Maxine was Pilot DS's Hobbyzone Outlaw, which has been discontinued by the manufacturer. This plane is a 2-channel plane that is perfect for the beginner pilot, who is unsure if s/he wants to committ to the hobby. This plane took a hell of a beating and kept performing time and time again. Sadly, after she was retired Pilot DS's depression set in and he has not flown the same since.
Learning 3-D

Hell's Eagle
This is my newest addition to my fleet. It is an Potensky EPP Eagle. This model came out in 2005; therefore it is an older model. I purchased it through Hobby-Lobby on clearance at $79 including 300 speed motor / 5:1 gear drive / ESC. Not a bad price. I put a Hitec Electron 6, two HS-50 & two HS-55 servos in it. It earned its name because it became a pain in the butt to get into the air. I learned a lot along the way, such as (1) never bench test at full throttle (2) be careful sanding EPP foam (3) it is better to burn a hole than drill through EPP -- to name a few. I killed my speed control before I ever got the bird in the air and replaced it with a 12 AMP ESC. The stock battery and compartment do not meet the CG; therefore I am going to have to create a new battery compartment. I cut foam out and moved battery as far forward as possible -- all the way to the wheel braces. It's not far enough forward. I did test fly it & with a tail heavy plane and a pilot that over sticks ailerons the plane rolled into the ground. The worst damage was the servo hing on the rudder broke off -- fixed in 5 minutes with epoxy -- simple. This is my first 4 channel plane I have owned. The next step is to meet with a local experienced pilot and reset the CG and go up with him using a "training cord." I use a Hitec Flash-5 radio and he owns a Hitec as well. This plan should yield best results without damaging plane. More posts to come...
This is my newest addition to my fleet. It is an Potensky EPP Eagle. This model came out in 2005; therefore it is an older model. I purchased it through Hobby-Lobby on clearance at $79 including 300 speed motor / 5:1 gear drive / ESC. Not a bad price. I put a Hitec Electron 6, two HS-50 & two HS-55 servos in it. It earned its name because it became a pain in the butt to get into the air. I learned a lot along the way, such as (1) never bench test at full throttle (2) be careful sanding EPP foam (3) it is better to burn a hole than drill through EPP -- to name a few. I killed my speed control before I ever got the bird in the air and replaced it with a 12 AMP ESC. The stock battery and compartment do not meet the CG; therefore I am going to have to create a new battery compartment. I cut foam out and moved battery as far forward as possible -- all the way to the wheel braces. It's not far enough forward. I did test fly it & with a tail heavy plane and a pilot that over sticks ailerons the plane rolled into the ground. The worst damage was the servo hing on the rudder broke off -- fixed in 5 minutes with epoxy -- simple. This is my first 4 channel plane I have owned. The next step is to meet with a local experienced pilot and reset the CG and go up with him using a "training cord." I use a Hitec Flash-5 radio and he owns a Hitec as well. This plan should yield best results without damaging plane. More posts to come...
Added poll
There isn't any update right now, but I have added a poll so you can vote for your favorite paper airplane out of the 4 that you can find in this site.
Update: Guillow's Piper Cub
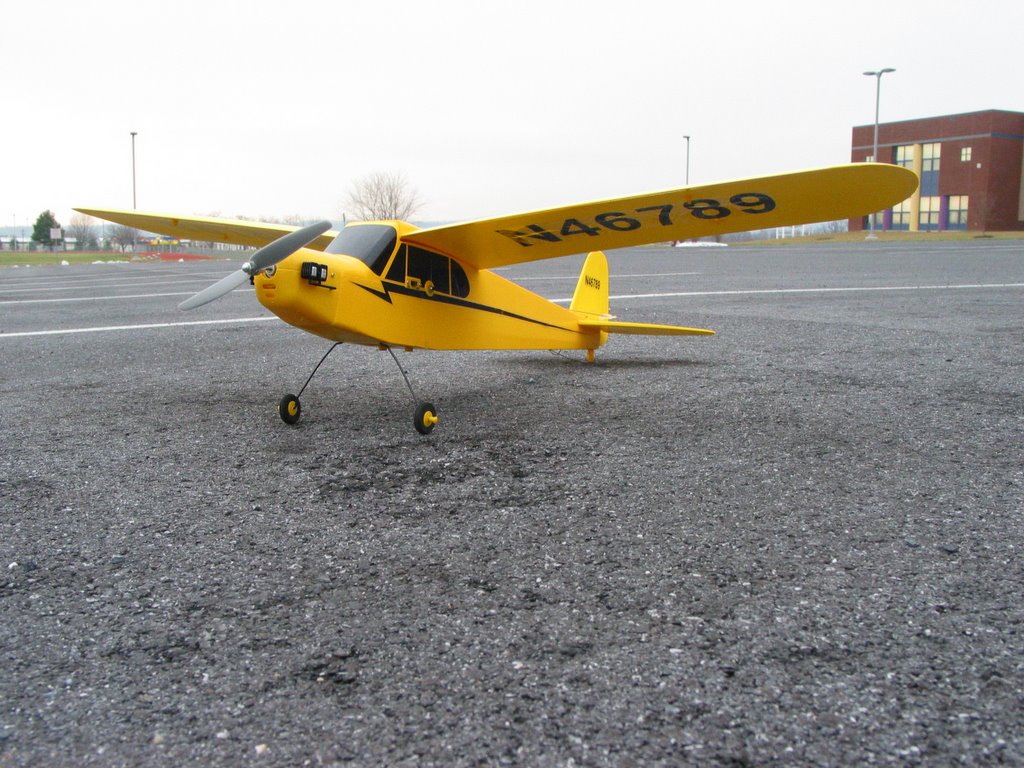
 This is Pilot JS's first balsa and tissue build. Test flights have been limited to low flying hand tosses. The plane angles a bit right and the right landing gear has been beaten up a bit. The CG (Center of Gravity) aligned perfectly. The plane flies nicely and gently. Currently, Pilot JS is waiting for a wind free morning to test fly the plane properly.
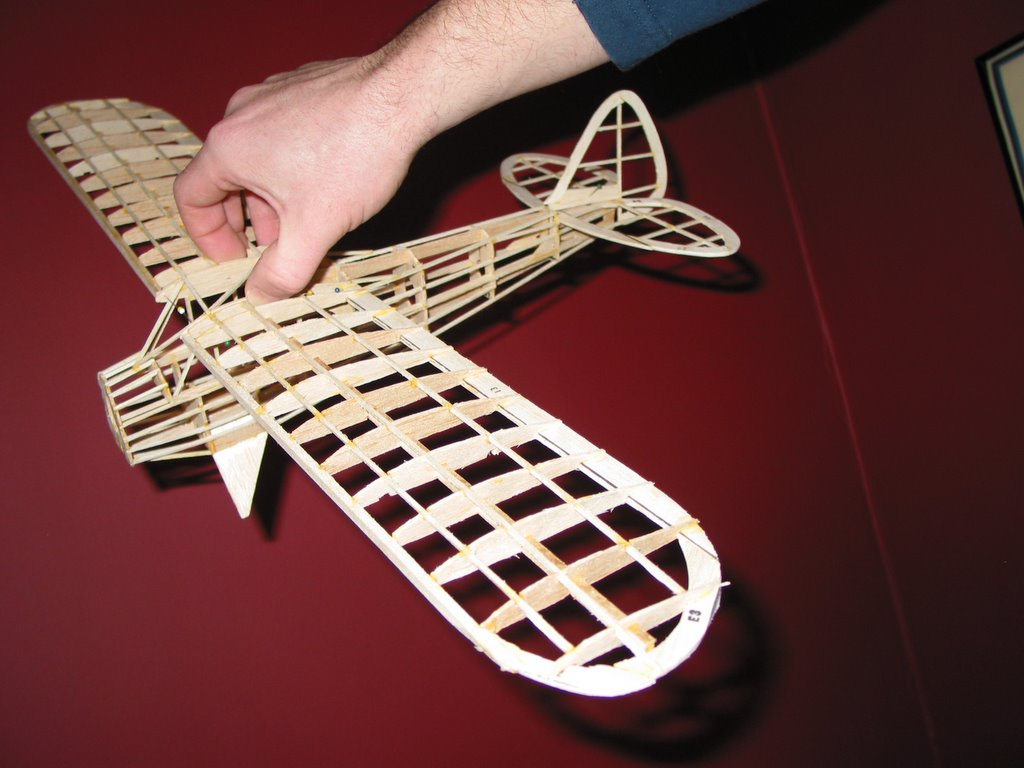 The build took Pilot JS about 20 hours. Below in a previous post with a list of "lessons learned." There are a couple more to add to the list (1) use two tooth picks to brace the wings to the fuselage. It is IMPORTANT that you peirce the tooth picks into place before you put the tissue paper on, (2) dry fit everything before adding the tissue paper, and (3) after placing the tissue paper on three sides of the fuselage run the rubber band through the fuselage.
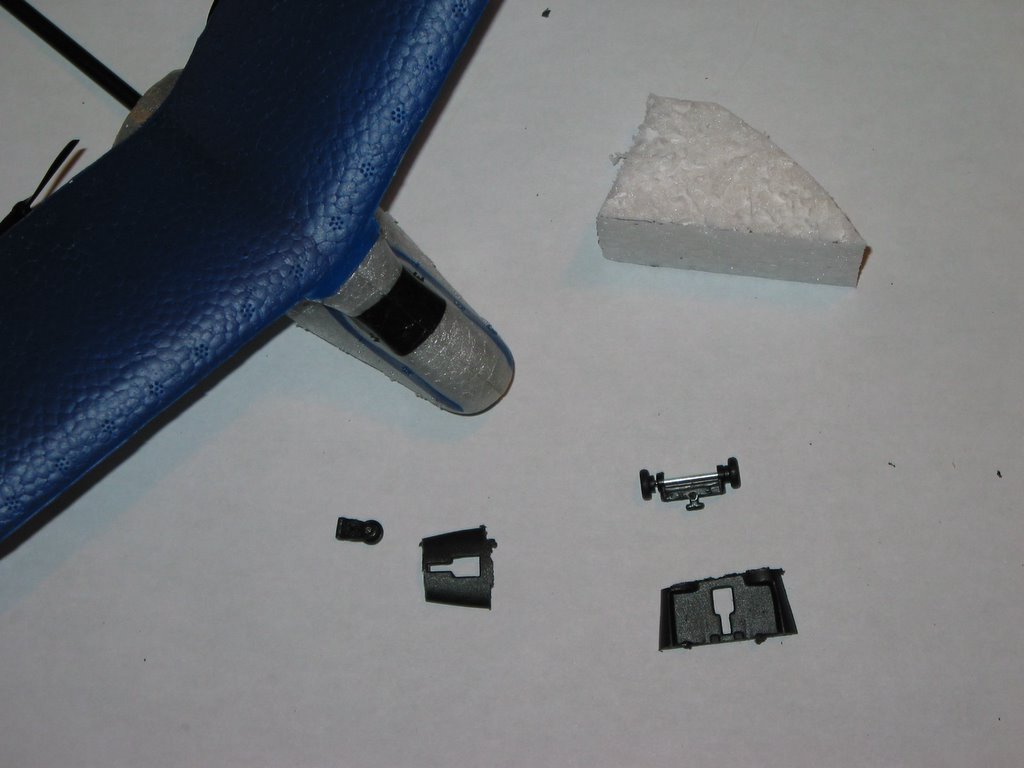
$1.97 Landing Gear for the AirHogs' AeroAce
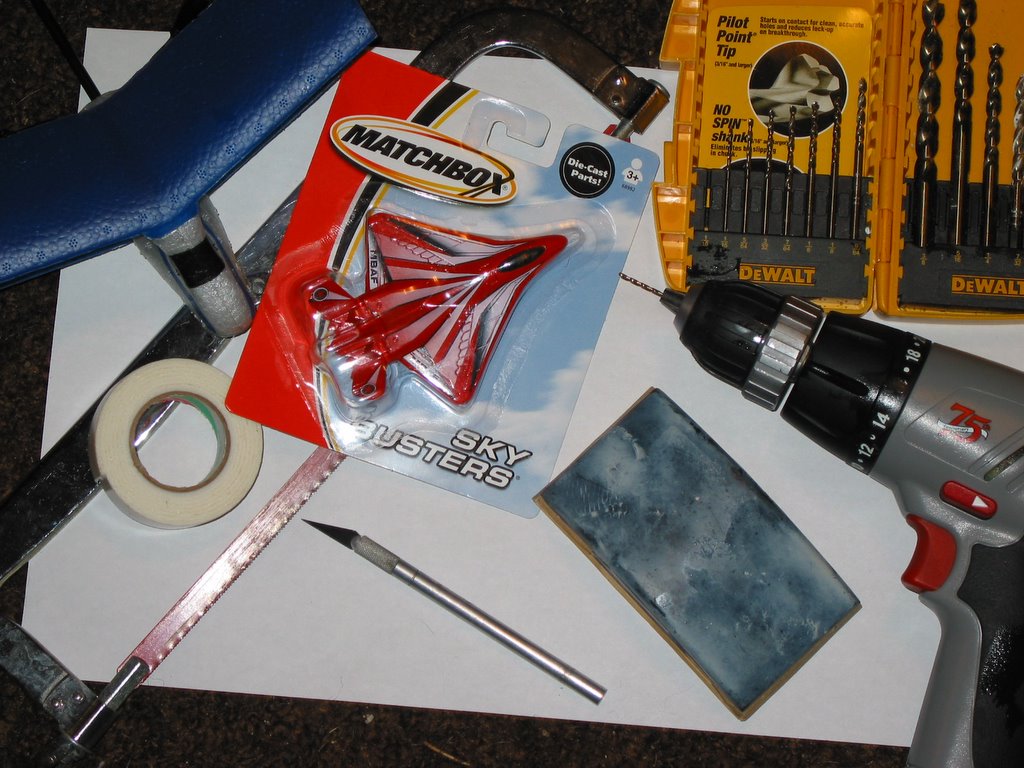
Without a doubt, if you are looking for a quick flight fix the AeroAce is perfect. Pilot JS flies his in his backyards all the time. It costs $29 at Target, Toys-R-Us, and K-Mart. It is a micro RC 2-channel bi-plane.
If you fly in a gym, parking lot, or any where with a hard surface you'd probably like a landing gear. The AeroAce is capable of ROG (rolling of the ground) takeoffs, touchdowns, and landings.
For $1.97 you can make your own landing gear. What need is (1) Matchbox airplane from Target, (2) drill with bit, (3) hack saw, (4) sandpaper, (5) double stick take or 5-Minute Epoxy, and (6) a block of EPP foam is optional.


Make Balsa Wood Snow Skis
 Pilot DS is obsessed with making snow skis as opposed to buying them. He quickly rubbed off on Pilot JS and now JS is on the bandwagon.
Snow skis are rather easy to make and can be done affordably. All you need is (1) a sheet of balsa, (2) a hobby knife, (3) a sand paper block with fine grit sandpaper, (4) a bowl of water, (5) polyurethane, (4) a set of small vice grips -- preferably hobby vice grips, which can be purchased for a few bucks at Harbor Freight Tools, (5) spray paint, and a (6) set of springs. The total cost for a set of ten skis costs me about $6.00 or $7.00.
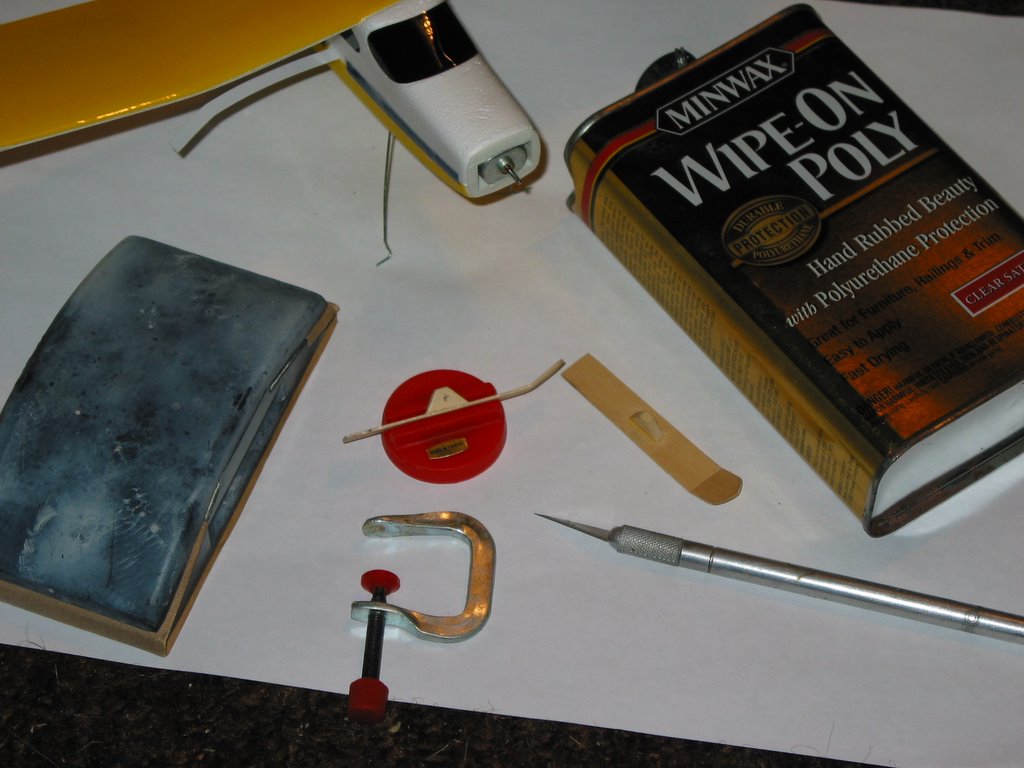 The first thing to do is use a pencil and very lightly sketch out the shape of the skis. Then cut the skis from the balsa sheet using your hobby knife. After that sand out the shape of the ski. Soak the skis in a bowl of water for 10 minutes. Remove the skis and using the vice grip lock the to a cutting board or workbench. Push a pencil under the nose of the ski to create the lip shape for the tip of the ski. Use a hair dryer to solidify the new shape of the ski -- this may take 5 minutes. Now cut out the wheel bracket and glue it to the ski using white glue. You may also decide to use a balsa wood brace down the length of the ski to reinforce it, if so do it now. Once it dries lightly sand everything down and wipe it clean with a micro fiber cloth. Now you are ready to use the polyurethane. I recommend applying 7-10 light coats. Allow skis to dry well before the next coat. After the final coat you can lightly spray paint your skis -- with outside furniture paint -- to match you skis. The final step is mount a spring from the front of the ski to the axel so that the ski can flux as you dive over snow. I highly recommend inserting a wheel pin and gluing it inside of the ski so when you mount the axel inside the ski the ski can easily rotate. We currently don't have snow, but once we do we will video tape the effectiveness of our skis.
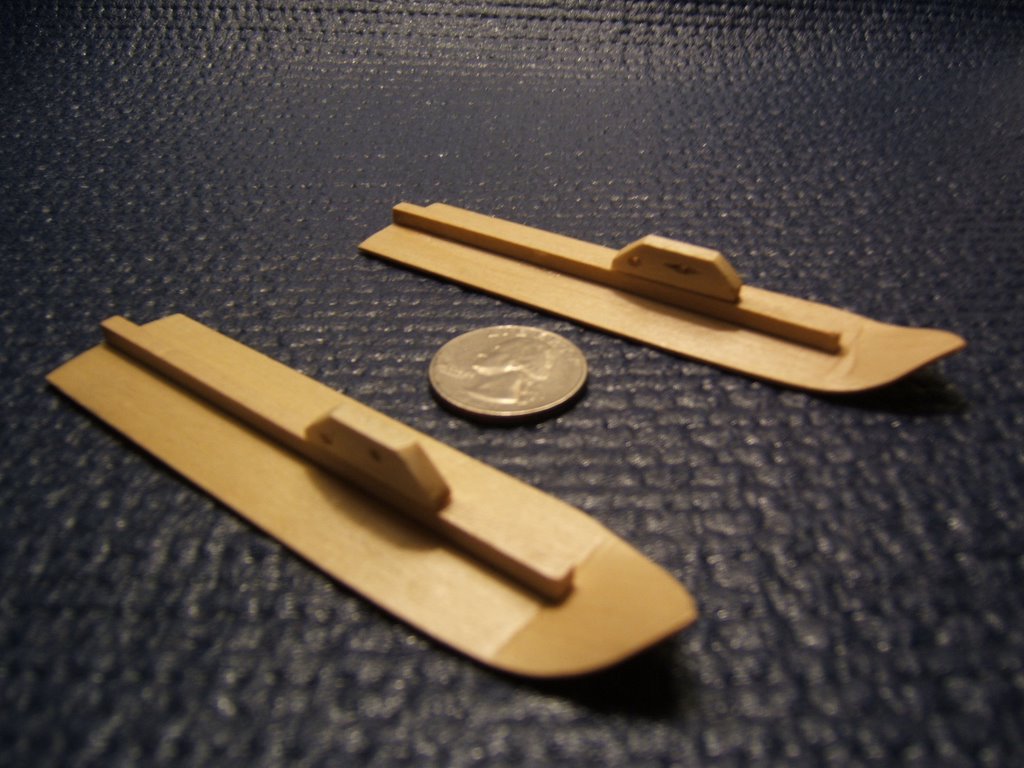
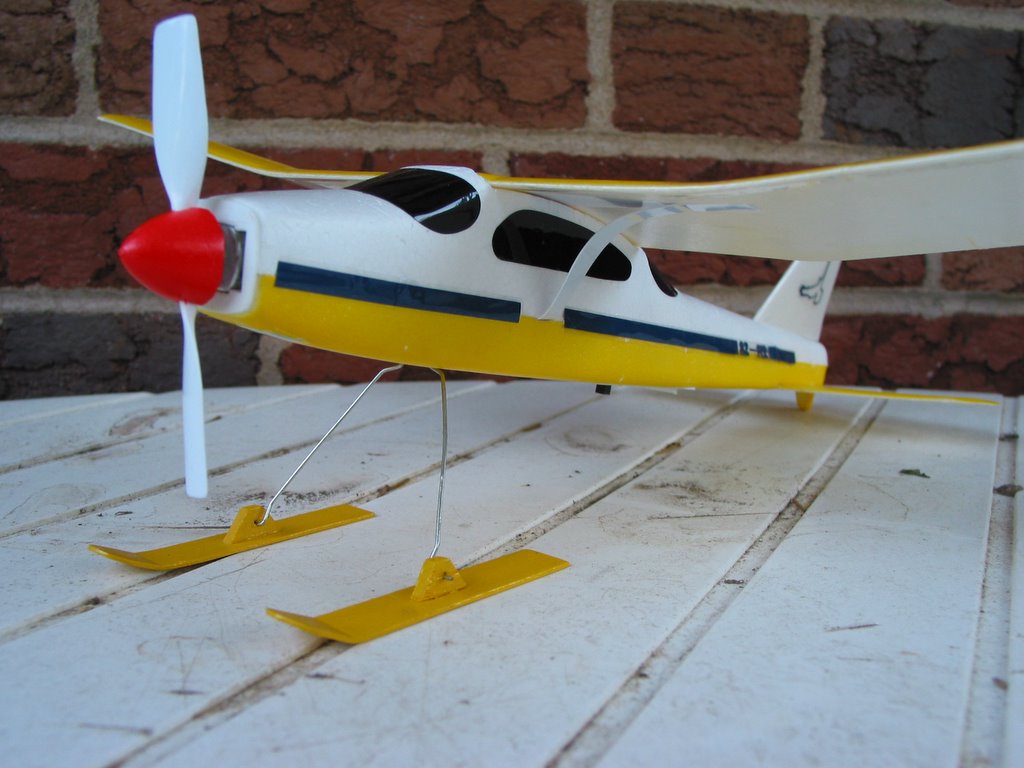
HF Plane with Floats
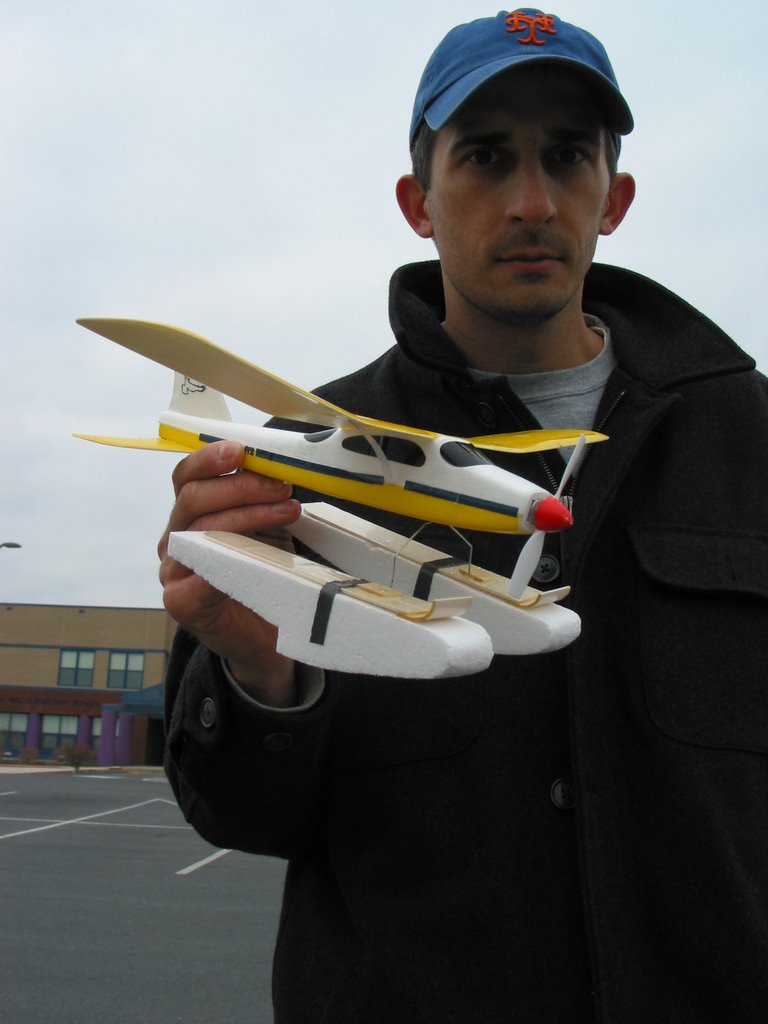
Pilot DS is back at it! He is designing floats -- which he plans will function and his HF plane will land itself successfully on a pond or large pool of water. His plane did fly -- stable -- but not far. Pilot DS is going to decrease the size of the floats. More information to follow…
Pilot DS & His EPP Spy Plane
 Pilot DS received an EPP RTF spy plane as a surprised for Christmas. It takes digital pictures and drops a parachute man, a bomb, & a glider. But, unfortunately this bird's maiden voyage was not a success. The trim was hard right with a lot of up elevator and no way to adjust it. Pilot DS and Pilot JS tried to fly any way, but they decided to quit while they were ahead. Pilot JS recommended that Pilot DS use a razor blade and open the cockpit, remove the servo arms, turn everything on, and then reconnect the servo arms at zeroed out trim. More news to come... Both pilots are excited and expect this bird to perform well.
Pilot DS & His SDM Piper Cub
Pilot DS took his maiden voyage with his brand new SDM Piper Cub. Unfortunately, it was tail heavy, but he was able to land it safely on the green. On the 2nd range check Pilot DS found that his throttle glitches and he realized he needed to return/exchange his plane. More info to come one the next maiden voyage…
If you are interested in an SDM Piper Cub, which Pilot DS bought on sale for $79.00 RTF at Harbor Freight, Google "RC Universe Forum SDM Cub."
Pilot JS & His Piper Cub
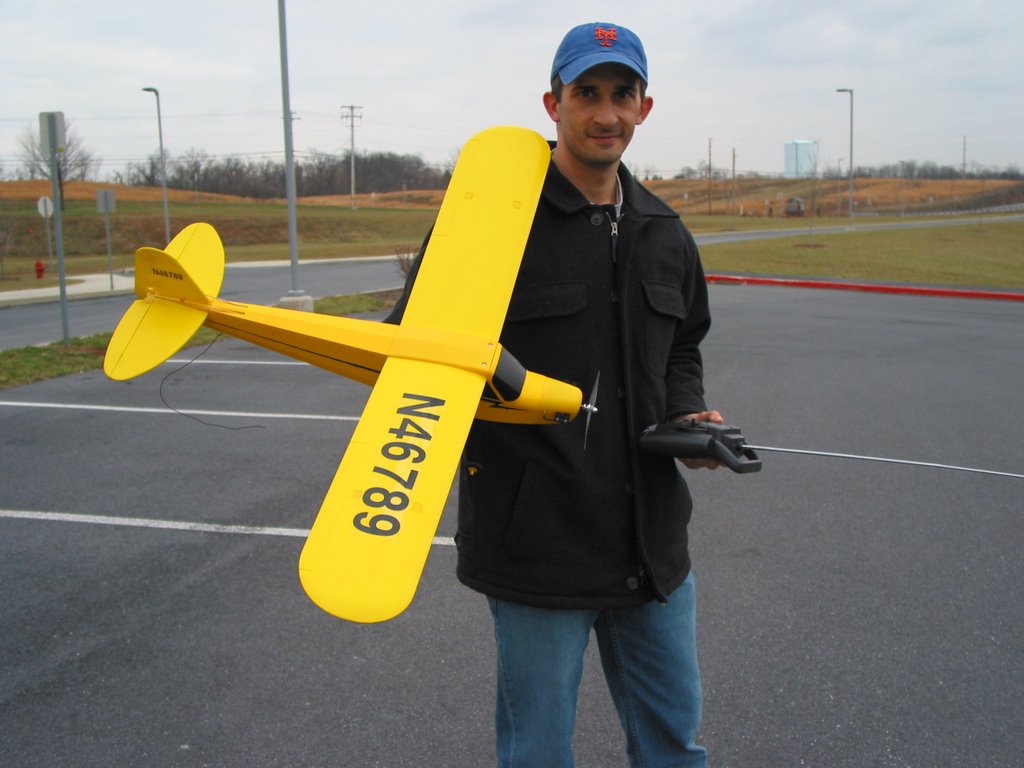
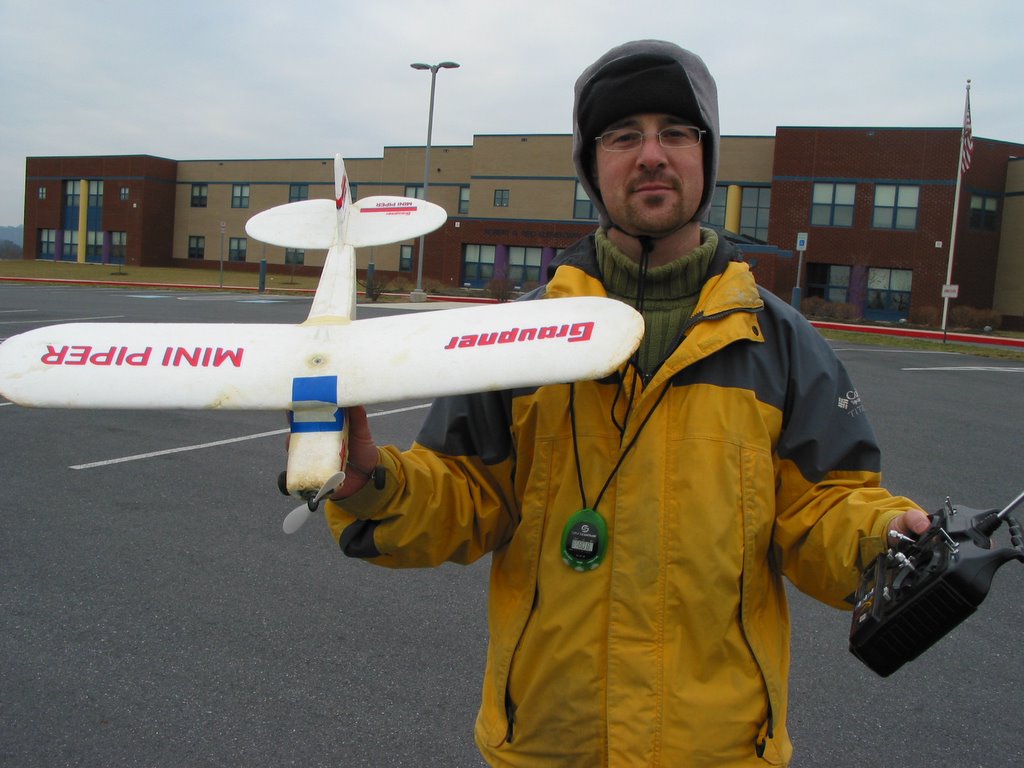 Pilot JS flies a Graupner Mini Piper from Hobby Lobby. He has flown for two years now (and as a kid, but was never good). On this particular day he had his best landing of career -- only using throttle -- flying to the ground. He now can do rolling takeoffs and landings very confidently. He can fly inverted with an extremely shallow dive out of a loop. He performs rolling touchdowns with ease. In the first two months of flying he destroyed his first plane -- too much stick! Because of this he has been able to save Pilot DS a lot of frustration, distress, and going home with broken airplanes. Pilot JS has purchased a Potensky Eagle EPP and is eager to learn aerobatics and very basic 3-D maneuvers this summer. He has also purchased a new Mini Piper and motor to replace his aging park flyer. The new paint job will be hot!
Guillow's Piper Super Cub 95 Build

Seeing as Pilot JS won the HF free flight airplane build off and for his prize Pilot DS bought him a Guillow's Piper Super Cub 95 -- Pliot JS decided he can no longer wait to begin building. This is his first model build using balsa and monokote. He aims to do just a little every day and take his time and care.
Recommendations from a novice modelist: (1) read all instructions completely before beginning build, (2) study the balsa wood die cut shapes before putting a knife to it, (3) using an Xacto blade trace along the die cut very carefully twice before removing each peice, (4) handle the model VERY carefully, and (5) take your time and care. Be patient. Do a little each day so that the experience remains positive and you avoid frustration.
So far the build is coming along not perfect, but nicely and the fuselage is completed. Pilot JS will continue to post photos of the build and will review his first flight. The estimated build time is 20 hours. Pilot JS has not decided if he will use a gas, electric, or rubber band power yet.
Pilot DS Attempts The Impossible
 Pilot DS recently upgraded his plane to a SDM Piper J-3. He trained using a Hobbyzone Outlaw RTF, but he has not outgrown it completely. He focuses on performing the impossible in flight. He does rolling takeoffs and touchdowns. Furthermore, he flies around trees and any obstacle he can find. He excited to attempt aerotowing with a lightweight glider.
The Outlaw's name is Mad Maxine (female version of Mad Max, the prelude to the movie "Road Warrior"). She is a tough bird and continues to fly predictably after many wrecks.
You can watch videos of Mad Maxine in-flight by clicking on the "Watch Blog Videos Here" link in the navigation on the right side toward the top of this page.
Competition No. Four -- Snow Skis
 Fact is balsa wood warps when it is wet, but the pilots' desire to be challenged remained strong. They decided to buy brand new Harbor Freight planes and mount snow skis to them. The skis had to be functional. The goal for the pilots was to build a plane that would both fly well and land itself.
The results were totally unexpected. Pilot DS completely redeemed himself! This competition took place on two different days, requiring some modification on both planes.
Pilot DS built snow skis from balsa wood -- cutting against the grain for added strength and
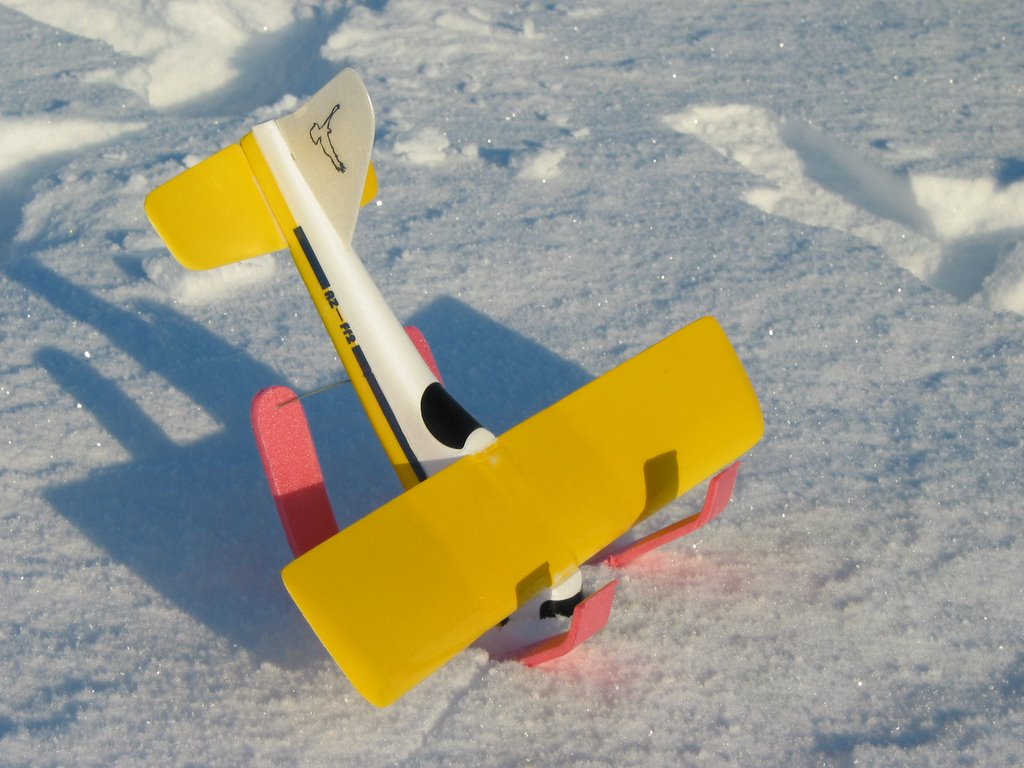 adding a curled nose to the ski as well. He sealed the skis with packing tape. The result was near perfect. The test flight resulted in a perfect landing. On a 3 minute charge the plane succeeded with a rolling takeoff and landing. Pilot DS was defined as "genius" with that flight. His plane achieved an altitude of 40' plus. Videos of his plane's successful flights are posted -- click the link in the navigation that bar that says "Watch Blog Videos Here."
Pilot JS performed poorly in this competition. Though his plane flew, it could not land itself. The skis were too stiff and broke every time sending his plane into somersaults across the snow. Pilot DS was keen to this and knew sucess was based on both wide and flexible snow skis.
The victor, Pilot DS and his winning plane:

Competition No. Three -- Friendly Fire
After Competition No. Two Pilot JS was awarded a "Piper Super Cub 95" balsa wood construction kit, by Guillow's. Photos will be posted upon the completion of the build.
Both pilots remained unfulfilled after the competition and they decided to have a "friendly" battle with no prize or losses involved. The rules are simple -- using the motor/prop/battery and any building materials they like they are to build a plane that maintains flight for :60 seconds. There is no deadline on the build or flight dates. It is ongoing. The first pilot to reach :60 seconds does not win, because if the other pilot can immediately beat the first pilot's flight by an additional :15 seconds. Then the pilots will continue to battle it out in :15 second-increments until the winner is determined.
Unfortunately, due to wet landing strips and poor weather conditions this competition is put on hold until spring 2006. Both pilots have built planes they are tweaking.
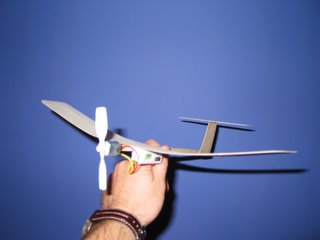
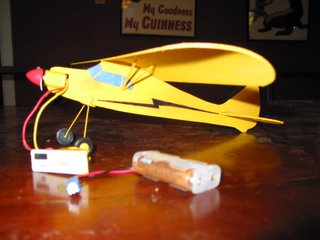
Pilot DS built a sports plane adaptation of the Piper Cub. It is a drunken plane and slips and slides in flight as it struggles to find stability. The elevator(s) work like ailerons providing both up/down and left/right trim.
Pilot JS's plane flies in a gentle and perfect left turn. It is the most stable plane to date that either pilot has built. On its first test flight in Pilot JS's backyard it reached 25-30' in altitude before it crashed into the second story of his neighbor's brick house. After repairs, he decided the tail/elevator construction was too weak (it was cut with the grain, but should go against the grain) so he modified it, but unfortunately did not mark the CG. On the next test flight the plane easily mantained :20 second flights while dragging its tail through the air. Pilot JS is confident that the plane will maintain :60 plus seconds of flight and reach 30-50' altitude after he readjusts the CG. The plane is not only stable in flight, but it is also very hardy when landing -- an important characteristic in these competitions.
Both pilots remained unfulfilled after the competition and they decided to have a "friendly" battle with no prize or losses involved. The rules are simple -- using the motor/prop/battery and any building materials they like they are to build a plane that maintains flight for :60 seconds. There is no deadline on the build or flight dates. It is ongoing. The first pilot to reach :60 seconds does not win, because if the other pilot can immediately beat the first pilot's flight by an additional :15 seconds. Then the pilots will continue to battle it out in :15 second-increments until the winner is determined.

Unfortunately, due to wet landing strips and poor weather conditions this competition is put on hold until spring 2006. Both pilots have built planes they are tweaking.
Pilot DS built a sports plane adaptation of the Piper Cub. It is a drunken plane and slips and slides in flight as it struggles to find stability. The elevator(s) work like ailerons providing both up/down and left/right trim.

Pilot JS's plane flies in a gentle and perfect left turn. It is the most stable plane to date that either pilot has built. On its first test flight in Pilot JS's backyard it reached 25-30' in altitude before it crashed into the second story of his neighbor's brick house. After repairs, he decided the tail/elevator construction was too weak (it was cut with the grain, but should go against the grain) so he modified it, but unfortunately did not mark the CG. On the next test flight the plane easily mantained :20 second flights while dragging its tail through the air. Pilot JS is confident that the plane will maintain :60 plus seconds of flight and reach 30-50' altitude after he readjusts the CG. The plane is not only stable in flight, but it is also very hardy when landing -- an important characteristic in these competitions.

Competition No. Two
The second competition included an unsuspected twist -- looks! Building materials were limited to (1) balsa wood, (2) motor/prop/battery, and (3) the landing gear. To make this build more challenging Pilots DS and JS agreed that (a) :03 seconds would be awarded to the best/functional landing and (b) :05 seconds would be awarded to the best looking plane. These additional seconds would be added to the flight time for the winning pilot.
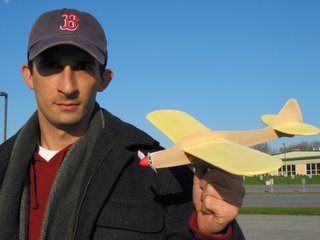
 Pilot JS made a scaled version of the famous Piper Cub J-3. With this plane its "looks" prevailed over its performance. Because of the over-curved wing the plane was very unstable during flight and looked as if it was drunk -- swaying from side to side as it attempted to fly.
 The pressure was on for Pilot DS to win this competition because if he lost again Pilot JS would win two of the three competitions and the battle would be over. Each pilot is given three timed flights and the longest flight counts. Both pilots use fresh batteries and a timer when charging their planes. Pilot DS was much more creative in his design, placing particular attention to his dihedral wing. His plane maintained :05 second flight making a gentle left turn, while Pilots JS's plane only sustained :02 seconds of flight.
 But because Pilot JS's plane landed itself and did not snap into peices on impact as Pilot DS's plane did the Cub was awarded :03 seconds. Furthermore, the Piper Cub won "Best Looking" and was awarded :05 additional seconds, making Pilot JS the victor once again. Though Pilot JS did not feel good taking Pilot DS's plane or the win this time.
 Pilot JS made a scaled version of the famous Piper Cub J-3. With this plane its "looks" prevailed over its performance. Because of the over-curved wing the plane was very unstable during flight and looked as if it was drunk -- swaying from side to side as it attempted to fly.
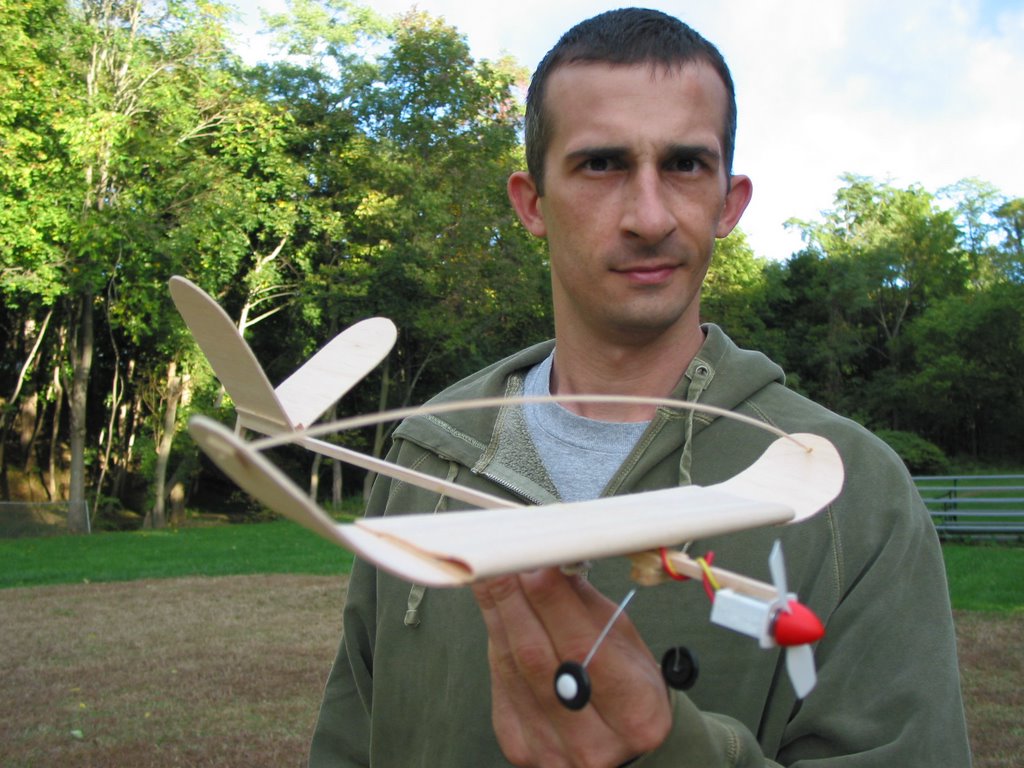 The pressure was on for Pilot DS to win this competition because if he lost again Pilot JS would win two of the three competitions and the battle would be over. Each pilot is given three timed flights and the longest flight counts. Both pilots use fresh batteries and a timer when charging their planes. Pilot DS was much more creative in his design, placing particular attention to his dihedral wing. His plane maintained :05 second flight making a gentle left turn, while Pilots JS's plane only sustained :02 seconds of flight.
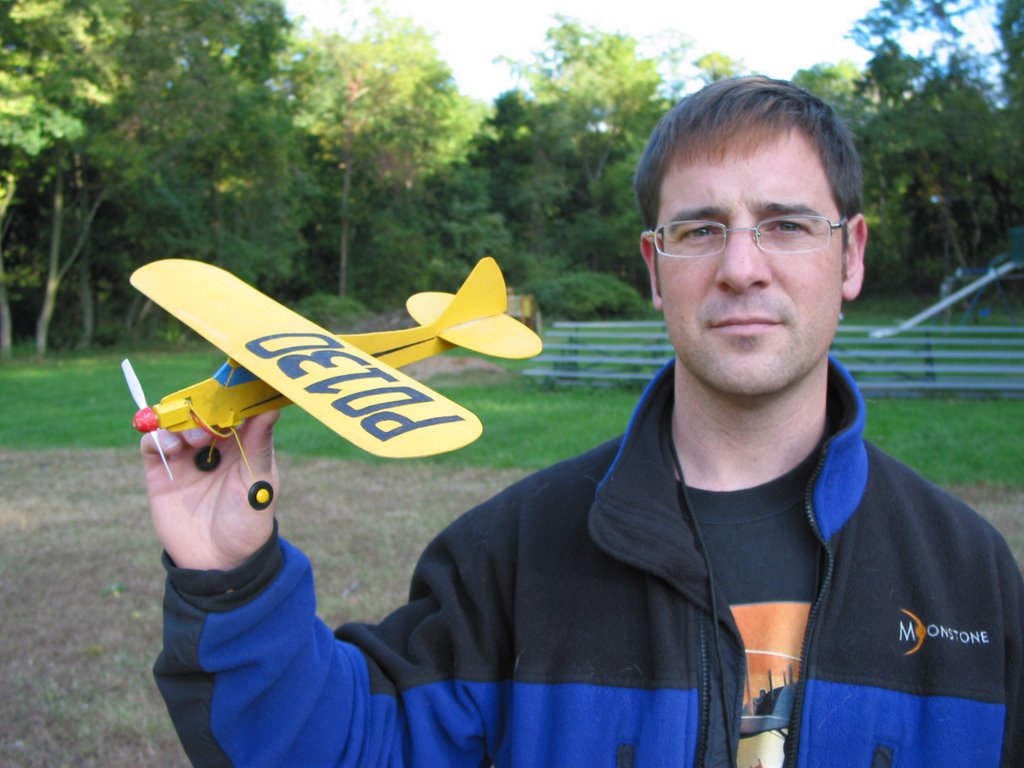 But because Pilot JS's plane landed itself and did not snap into peices on impact as Pilot DS's plane did the Cub was awarded :03 seconds. Furthermore, the Piper Cub won "Best Looking" and was awarded :05 additional seconds, making Pilot JS the victor once again. Though Pilot JS did not feel good taking Pilot DS's plane or the win this time.
Competition No. One
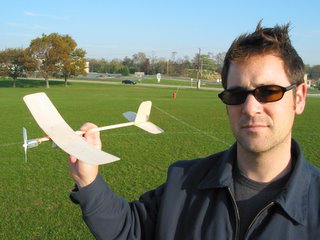
 The materials for this challenge were limited to: (1) styrofoam meat trays from the grocery store and (2) balsa wood.
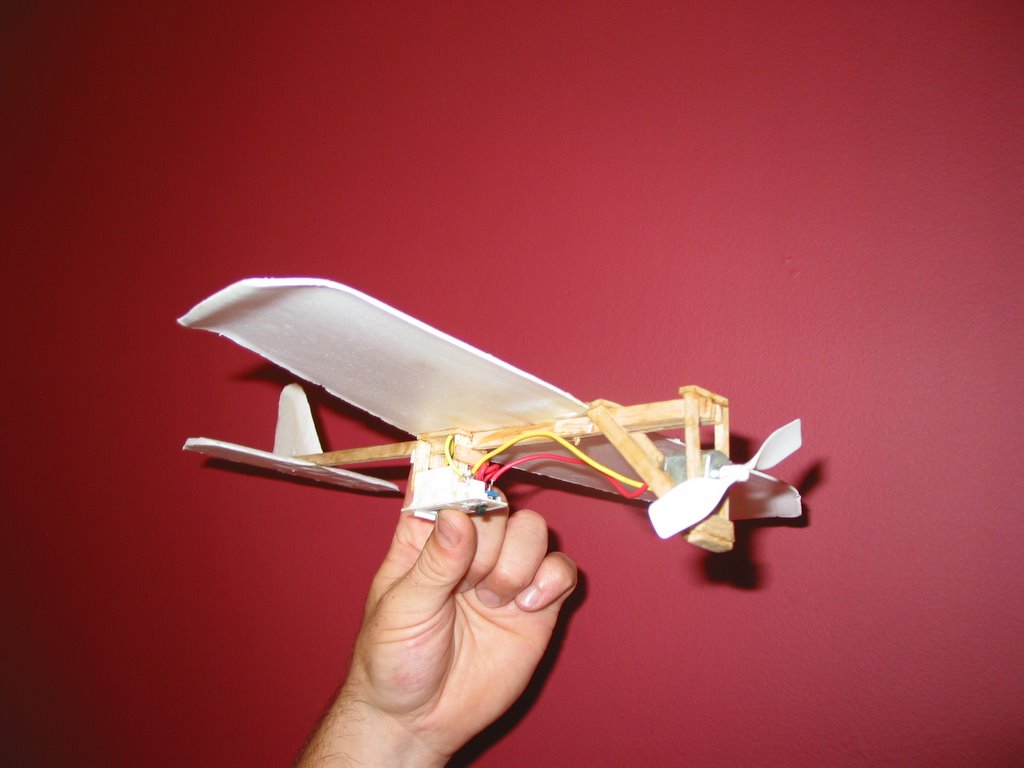
The image of the plane to the left is Pilot JS's prototype plane, which failed to perform well. It nose dived and broke on all three test flights.
Likewise, Pilots DS's plane performed poorly, though it was an attractive design. Pilot DS did not know to balance the CG (center of gravity) and his plane nosed dived to its death!
On the flip side, Pilot JS's plane maintained an estimated :31 second flight with a 2 minute charge. It flew approximately 50 yards and reached an altitude of about 15 feet.
 At the end of Competition No. One Pilot DS handed over his first plane to the victor: Pilot JS and his :31 second plane.
The Harbor Freight Plane Challenge

"The Harbor Freight Plane Challenge" is a competition that continues to evolve between two friendly RC plane pilots. The Harbor Freight (HF) airplane can be purchased for $6.99 (Google Harbor Freight and search for "airplane") on sale - sales are frequent.
Pilot JS first challenged Pilot DS in Spring 2005 to gut the HF plane for motor, prop, battery, and charger and build three planes (1) with styrafoam and balsa (2) with balsa wood (3) with a kit. The winner was determined by who's plane stayed in the air the longest. The loser would hand over his plane (pink slip) at the end of each competition. The winner of two out of three competitions was awarded a rubberband plane kit ($15) from the local hobby store.
The winner of this competition was Pilot JS.
Bios:
1) Pilot DS currently flies an Hobbyzone Outlaw RTF and recently purchased an SDM Piper Cub J-3 RTF.
2) Pilot JS flies a Graupner Mini Piper and is currently building a Potensky Eagle EPP.
Subscribe to:
Posts (Atom)